

How To: Isolate Images for Stagger
A lot of creators struggle to tell an engaging story with their imagery within their social media platforms. Let's take Instagram for example. It's hard to tell a really interesting story with ten swipable content holders and hold your audience's attention enough to have them wanting to keep swiping left.
We've sat with a lot of creators and consumers of creator content to understand what keeps them engaged. At Stagger, we like to use what we call the "peek-a-boo" effect. "What the heck is a peek-a-boo effect ?" you ask. Let's unpack it.
What Kind of Story Do You Want to Tell
The carousel can be a powerful storytelling tool for your content. It can be more than just a way to show 10 individual images. Think about the days we took our cameras and film to the convenience store on the corner to develop the pictures we took from the weekend in one hour. When we got that envelope back, we unpacked the photos and would do one of two things:
- Flip through each image, one by one, until we got to the end the stack,
- Spread them out on a table, pointing to each photo and telling a story of how they led to one another
It's the second bullet that we focus on here at Stagger. It's the thread that weaves those images together to tell the whole story of what that film captured.
Use Imagery Focal Points to Bring the User Into Your Story
Let's dive in to how you can break the carousel to reveal more of your story than one frame at a time. Let's take these example images as an example. I've chosen a few images from a trip to Portugal that I want to post to my Instagram.
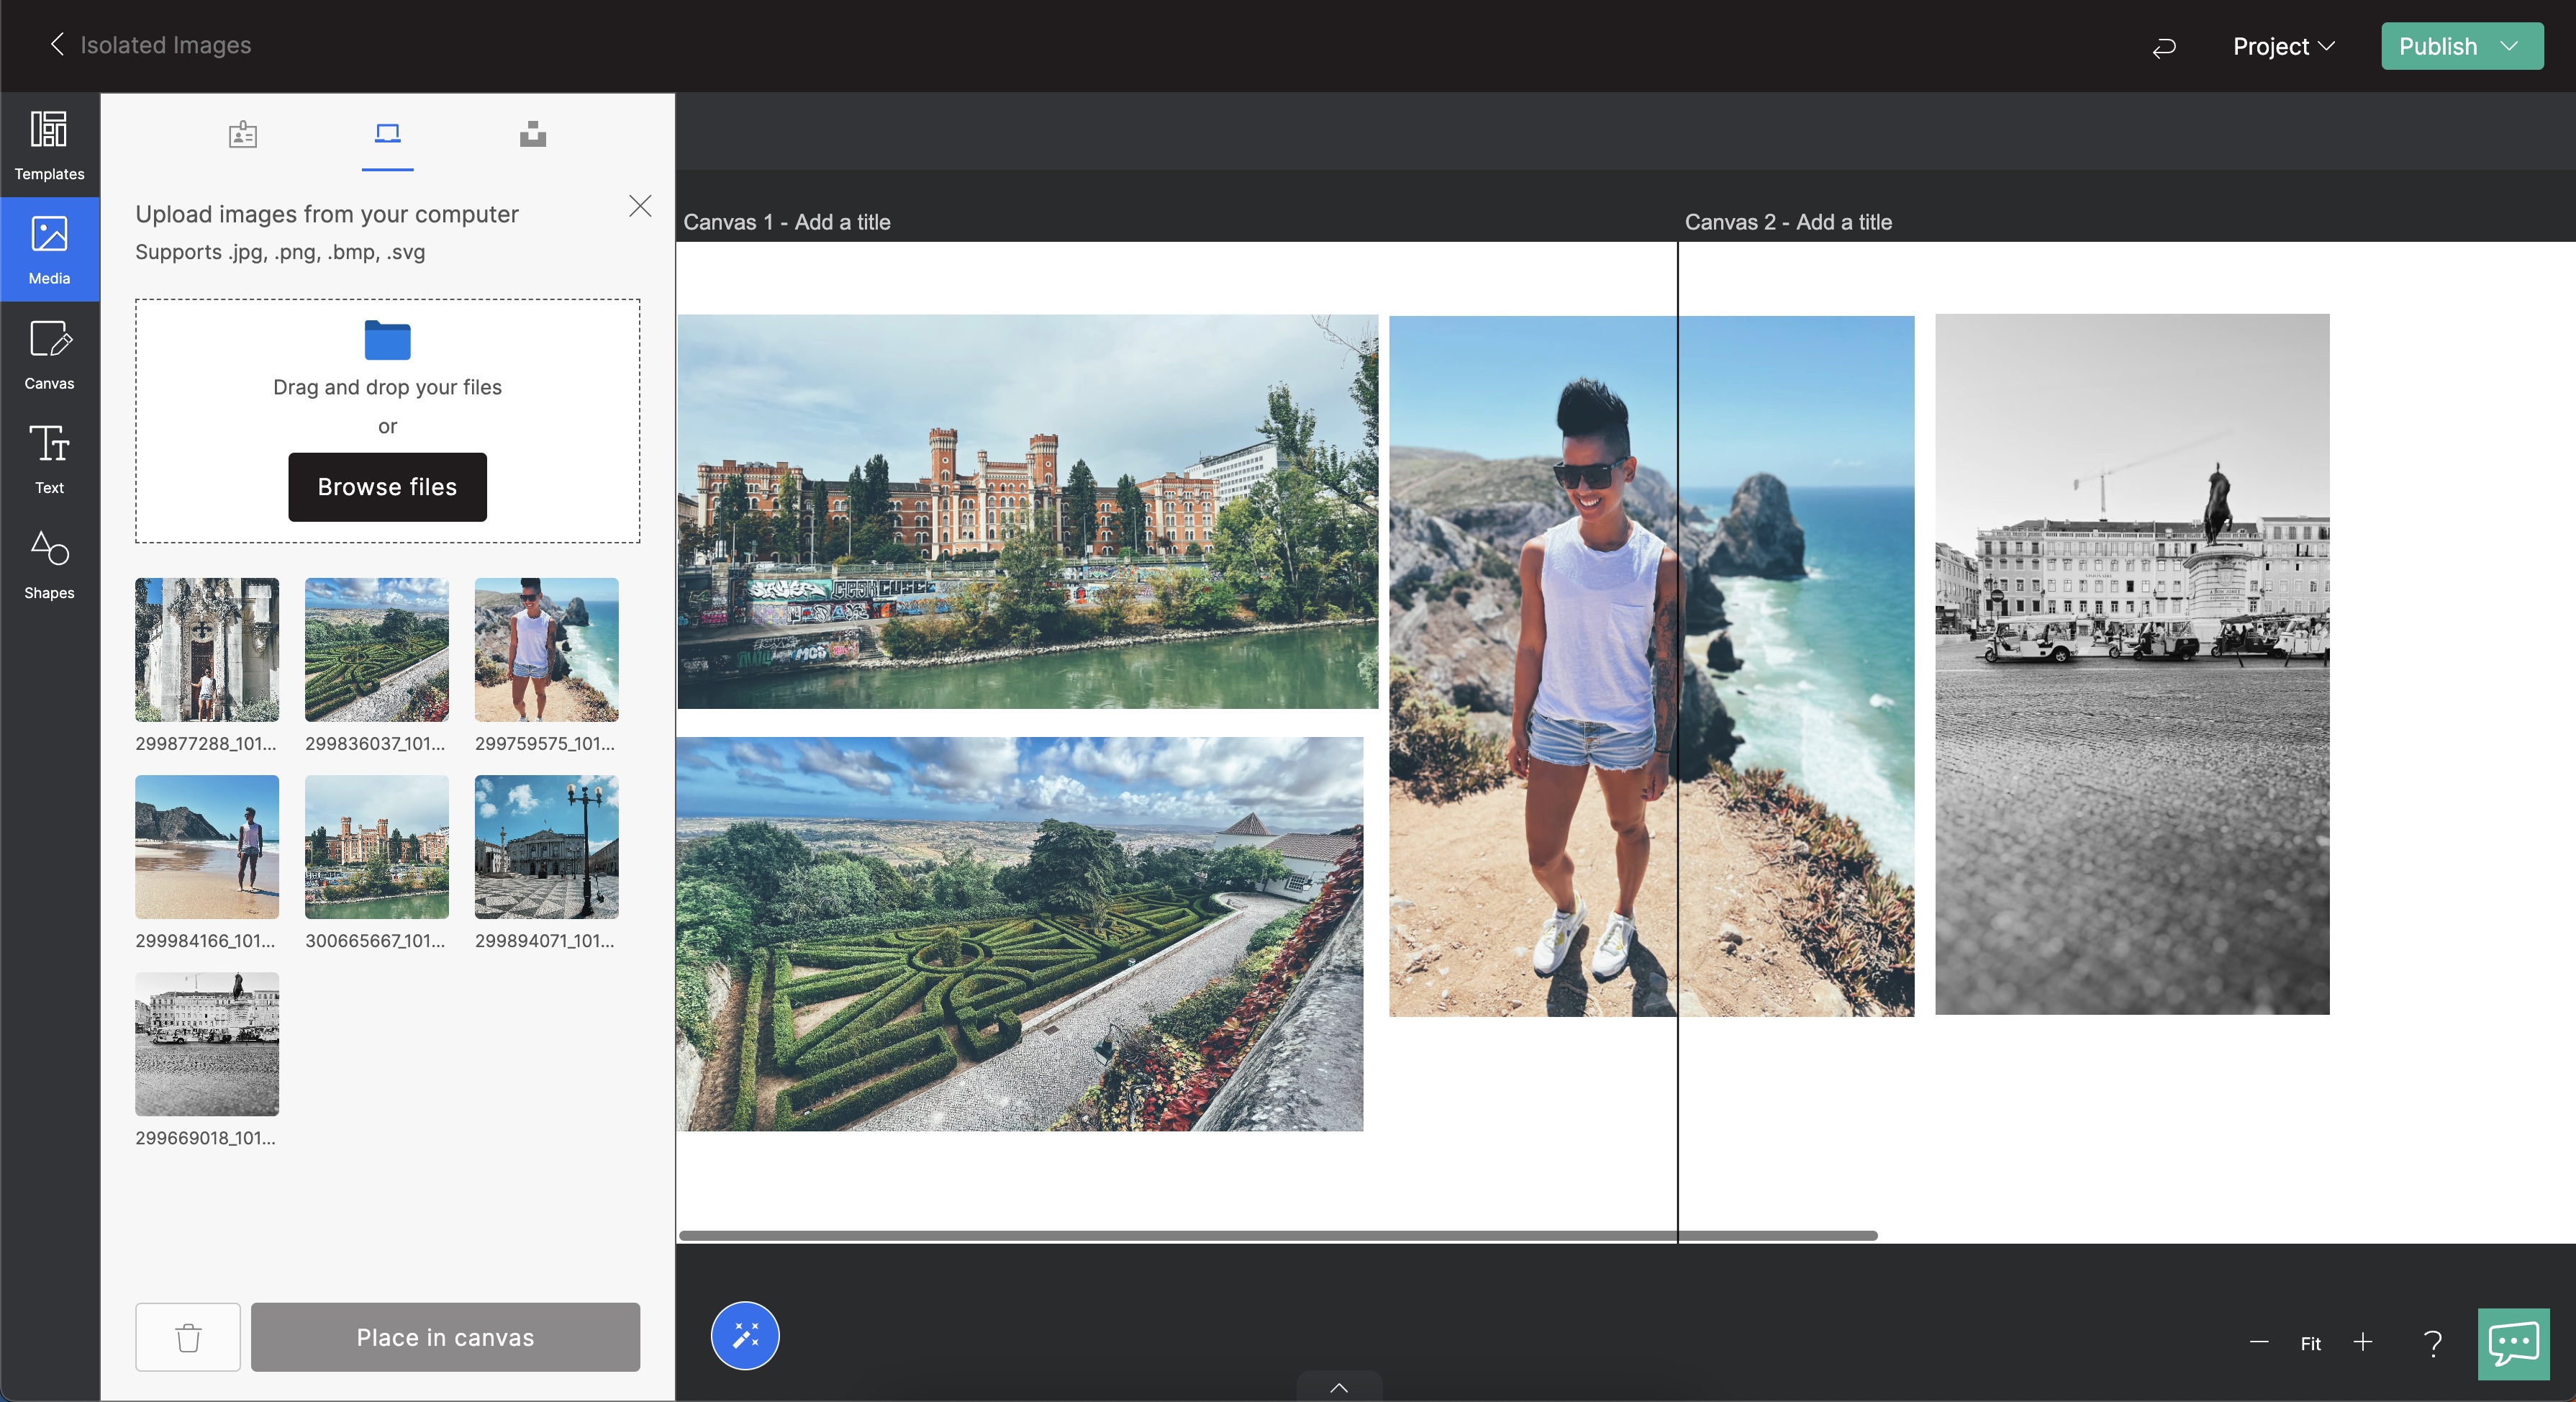
I start placing images on the canvas. Some take up one canvas. Some expand and cover more than one canvas at a time. I can use the canvas dividers to help understand where the image breaks for an Instagram carousel.
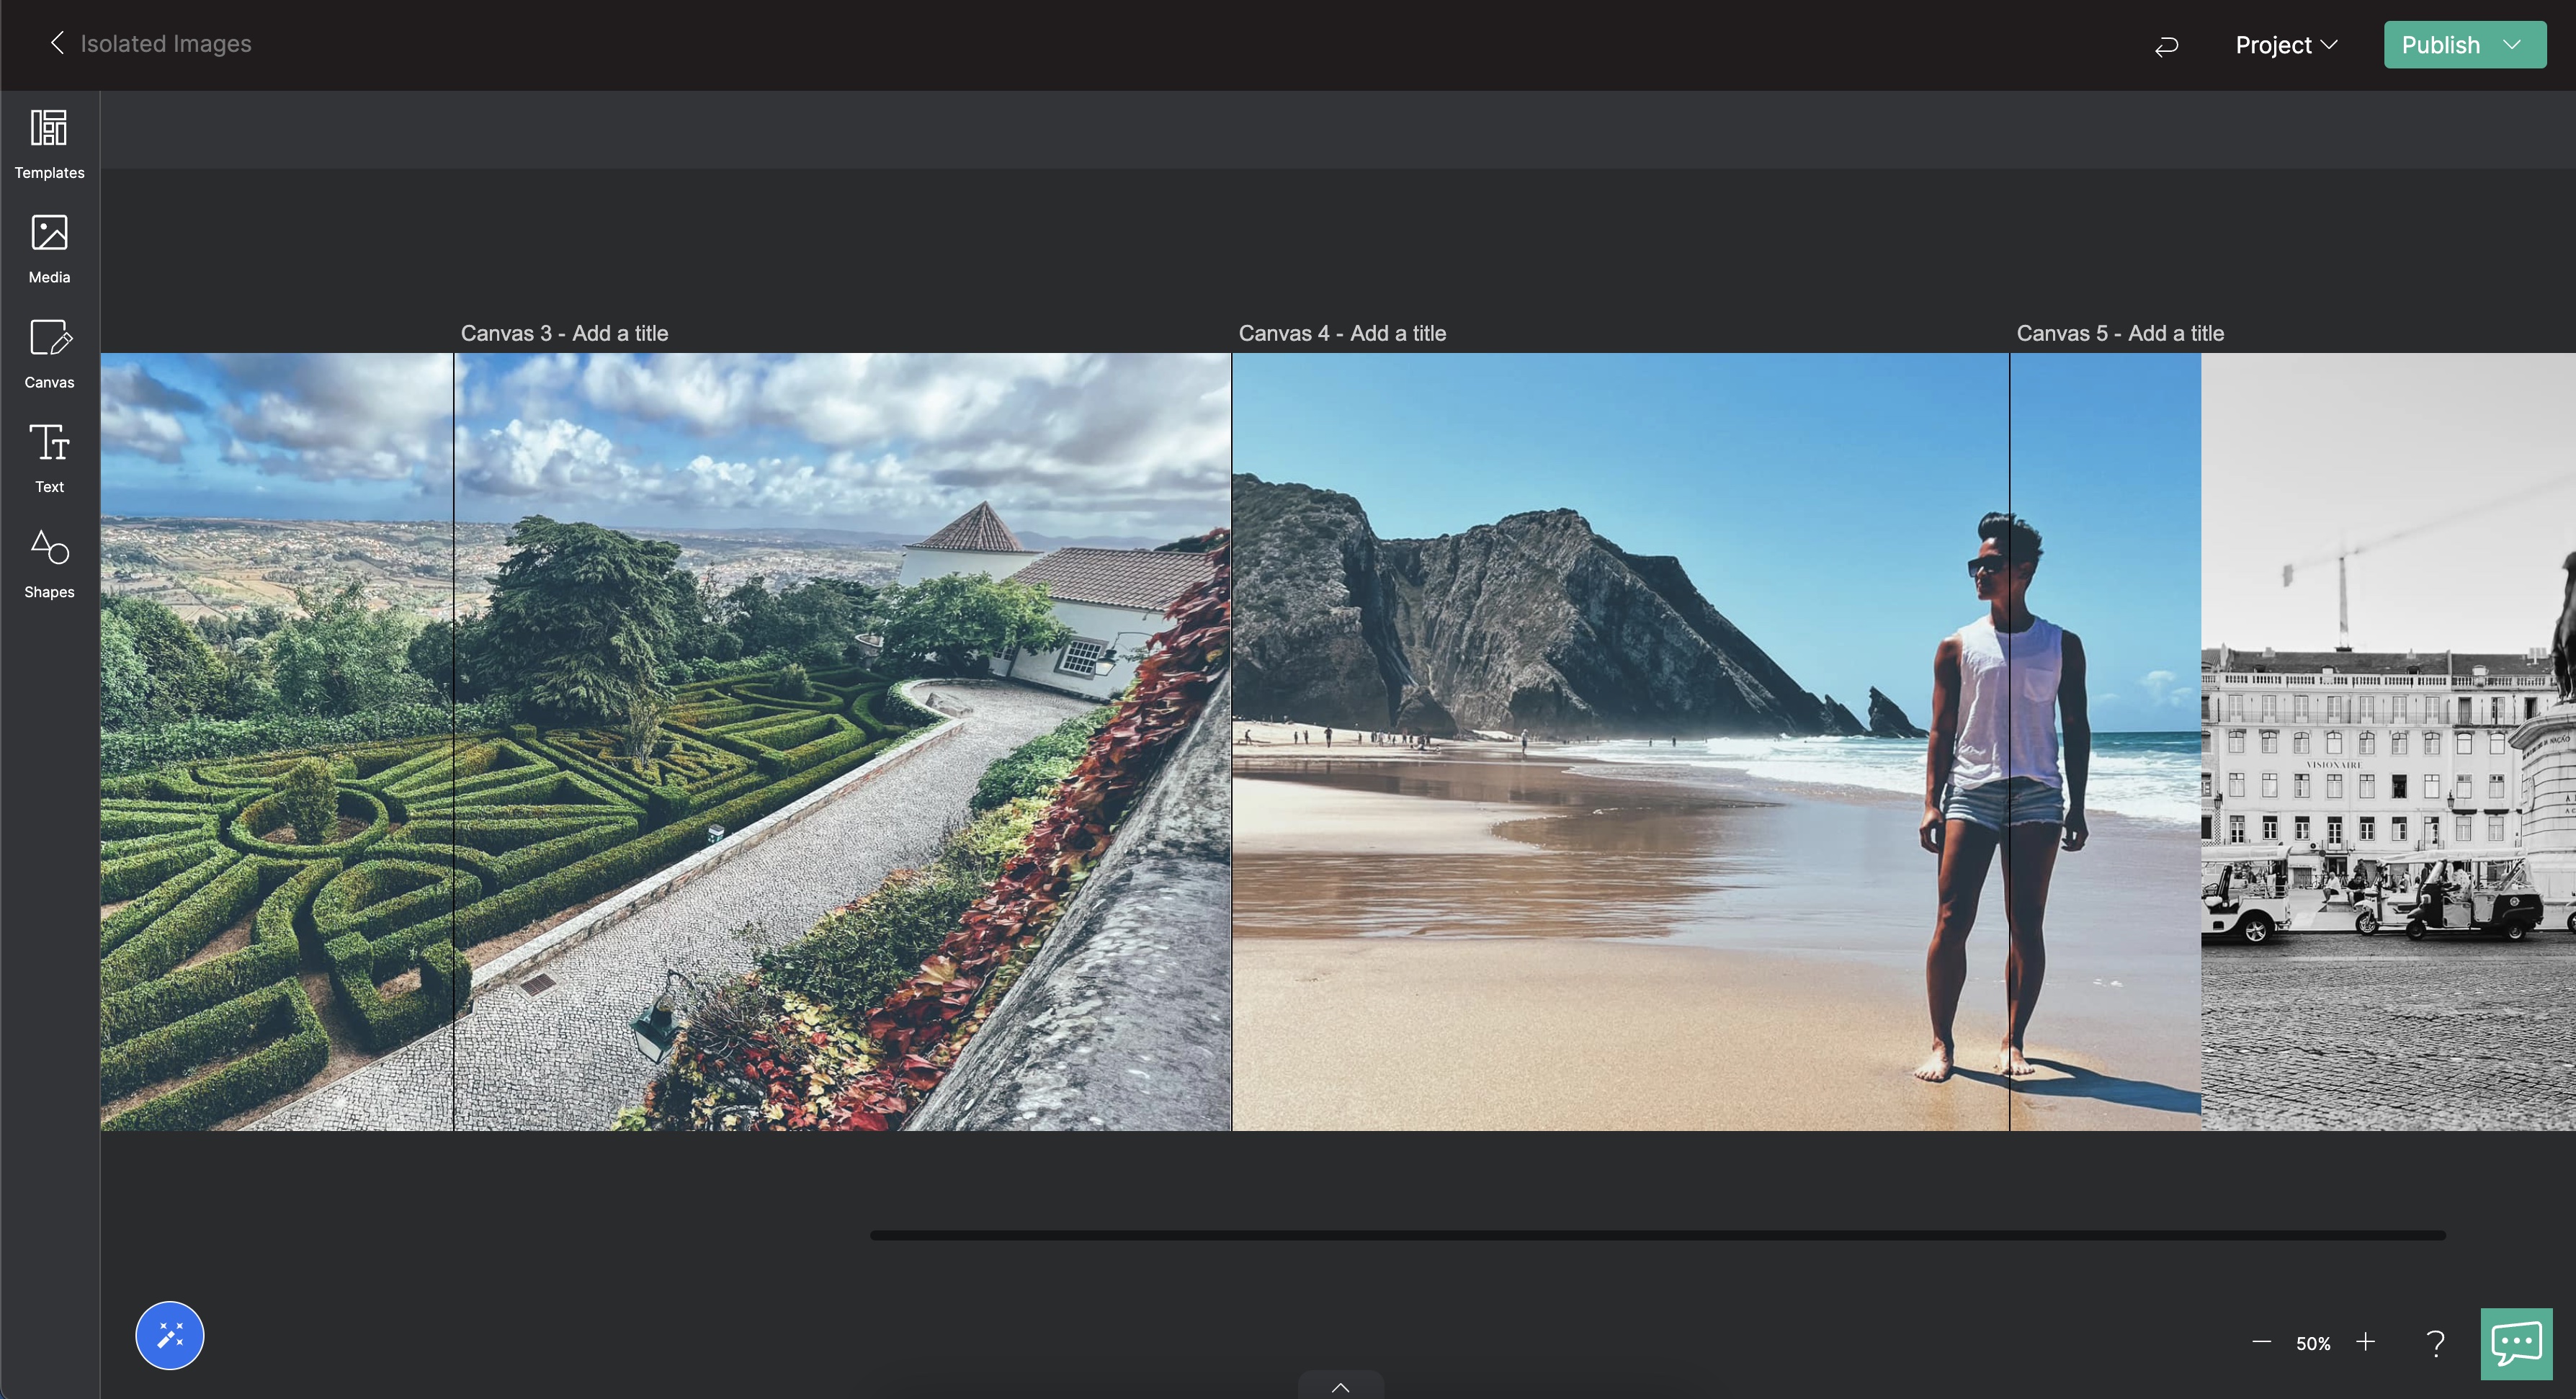
I want the image of myself to appear to "bleed" into canvas 5 and overlap the image in canvas 5.
To do this, let's go through the following steps:
- First, let's make a copy of the image. We'll need two instances of the image to get this effect. Make a copy by hitting "Cmd/Ctrl+C" and then "Cmd/Ctrl+V"
- You'll see a copy of your image pasted on top and offset of your original image.
- Then, select, the image you just pasted.
- You'll see the image toolbar appear in the editor below the main toolbar.
- Click on the "Remove Background" button.
- You should now see a duplicate and cut out object of the image you selected. Here's an example of mine:
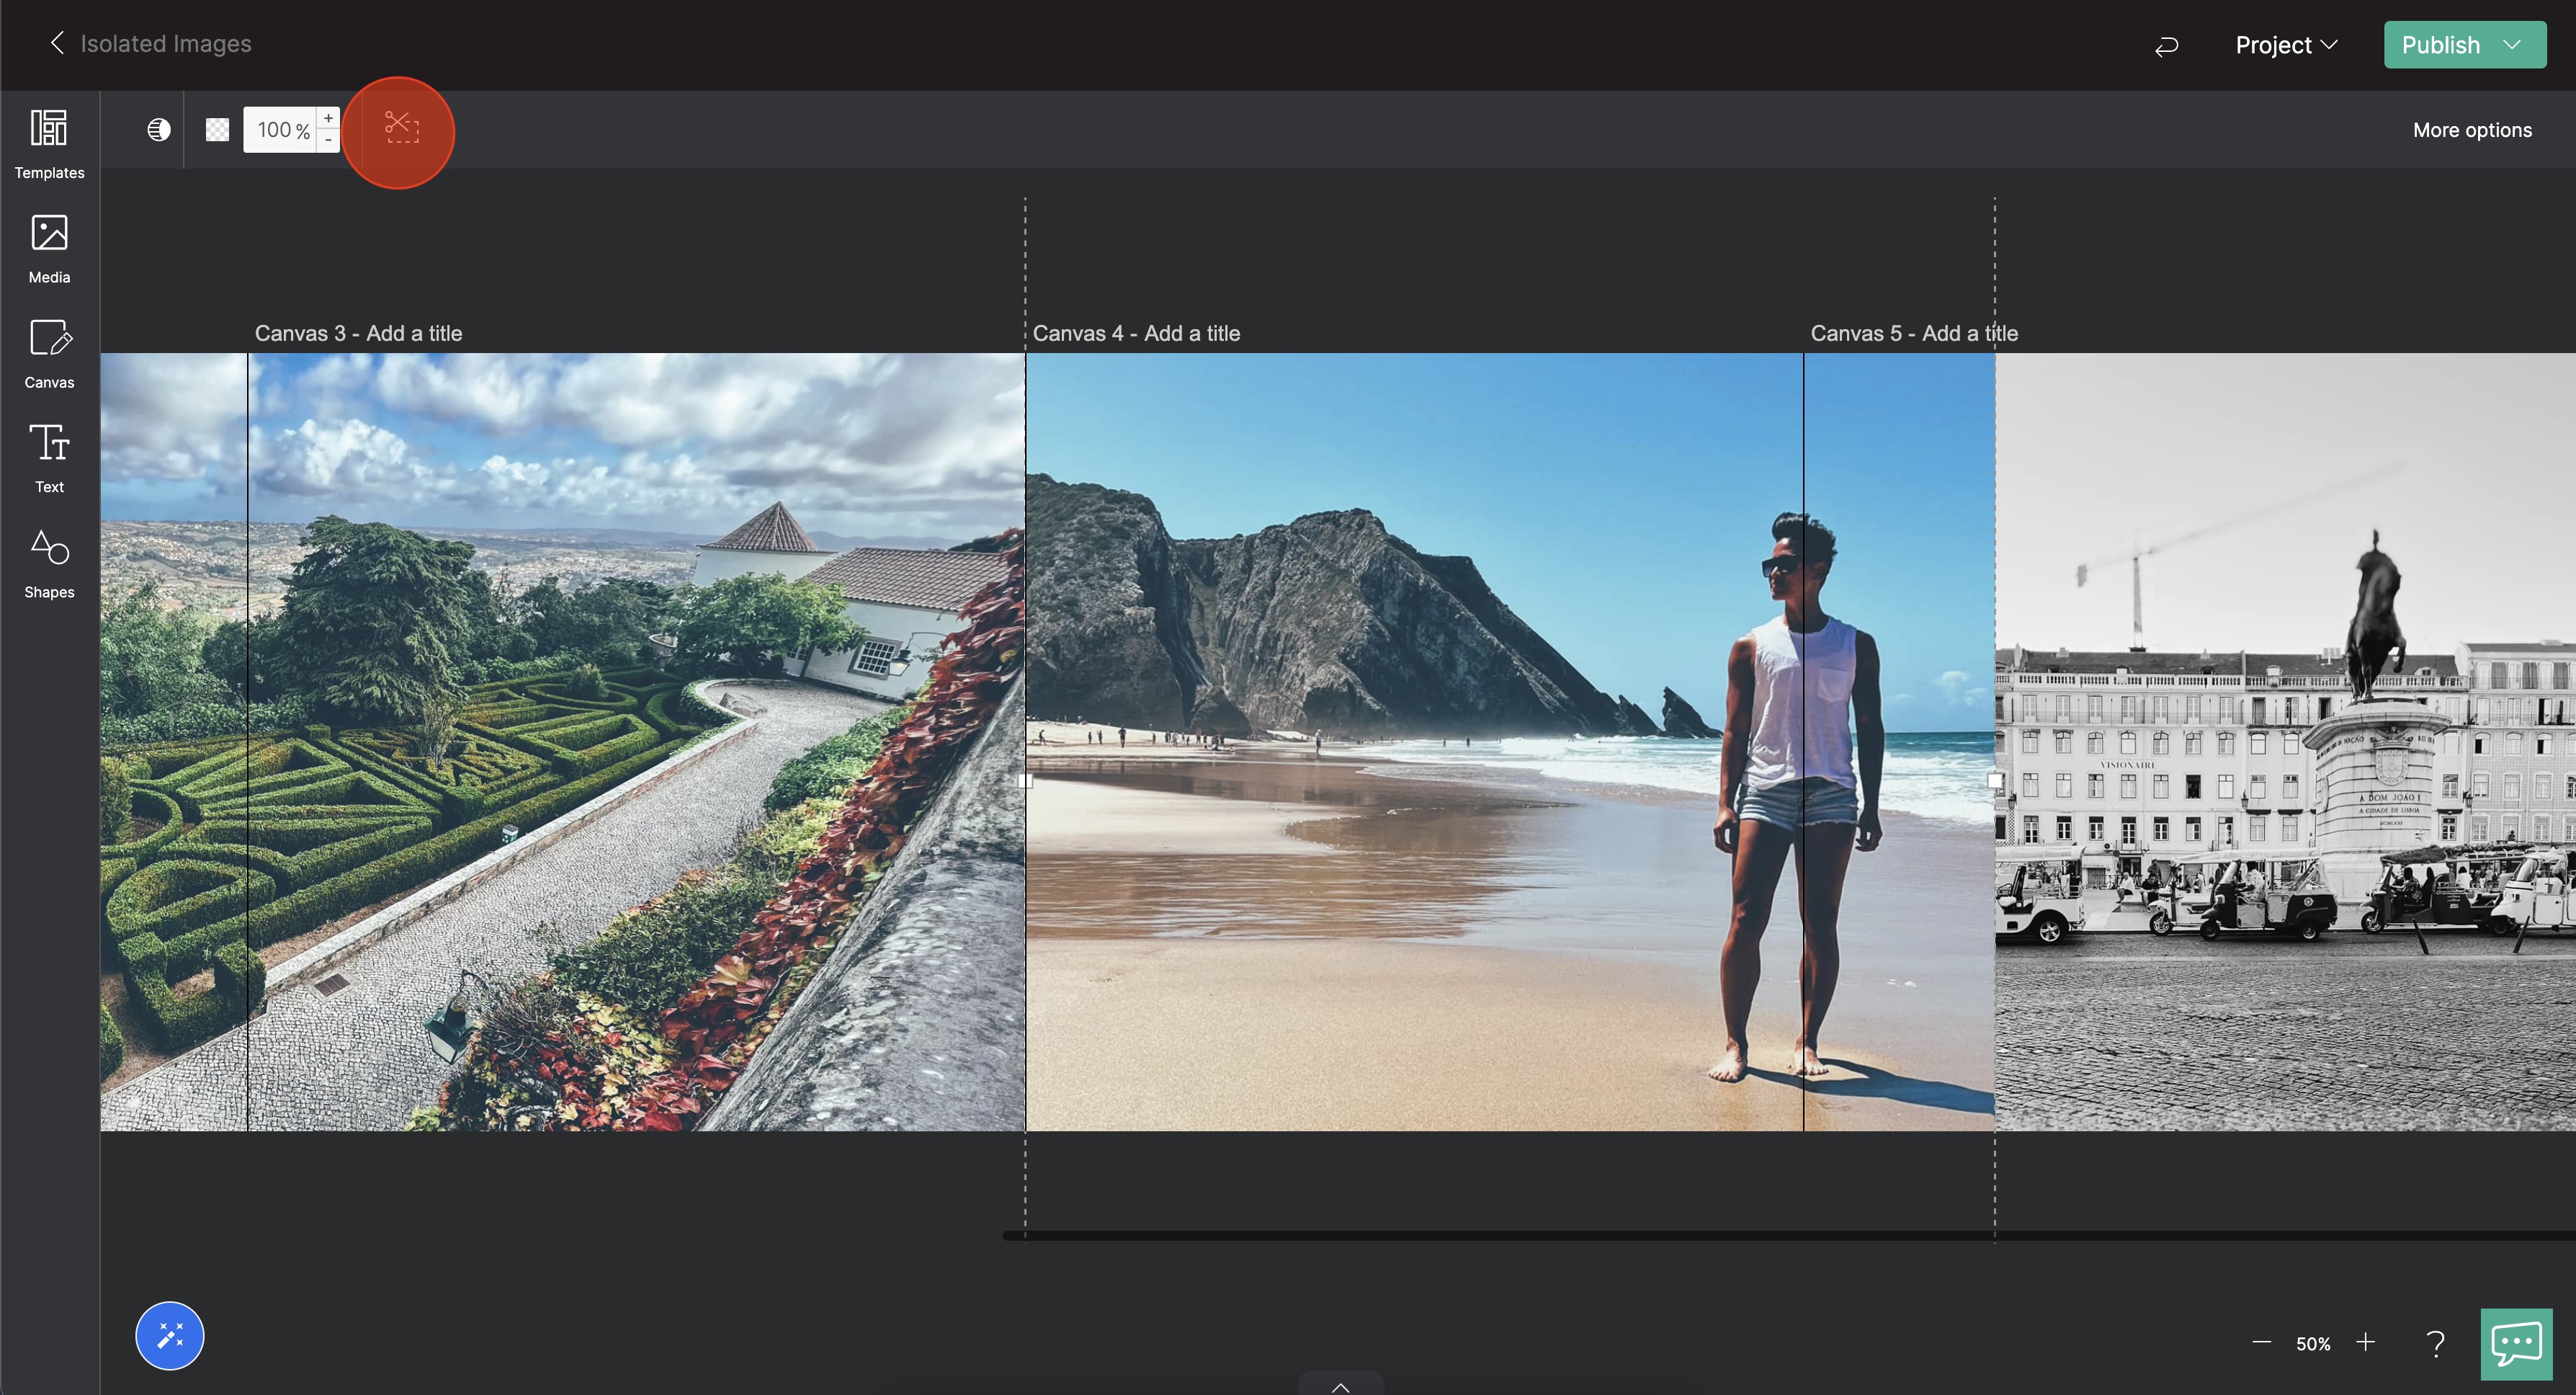
- Now we want to Mask the original image to give the illusion of the peek-a-boo on canvas 5.
- Move the duplicated and cut out object off to the side so you can select the original image.
- Select the original image and click on the "More Options" button in the secondary tool bar. (Or you can right-click on the image and select "Mask Image".
- You'll see the image outline in a green border. The green border acts as the image's new mask.
- For this tutorial, I'm going to move the mask to stop right at the divider of canvas 4 and canvas 5.
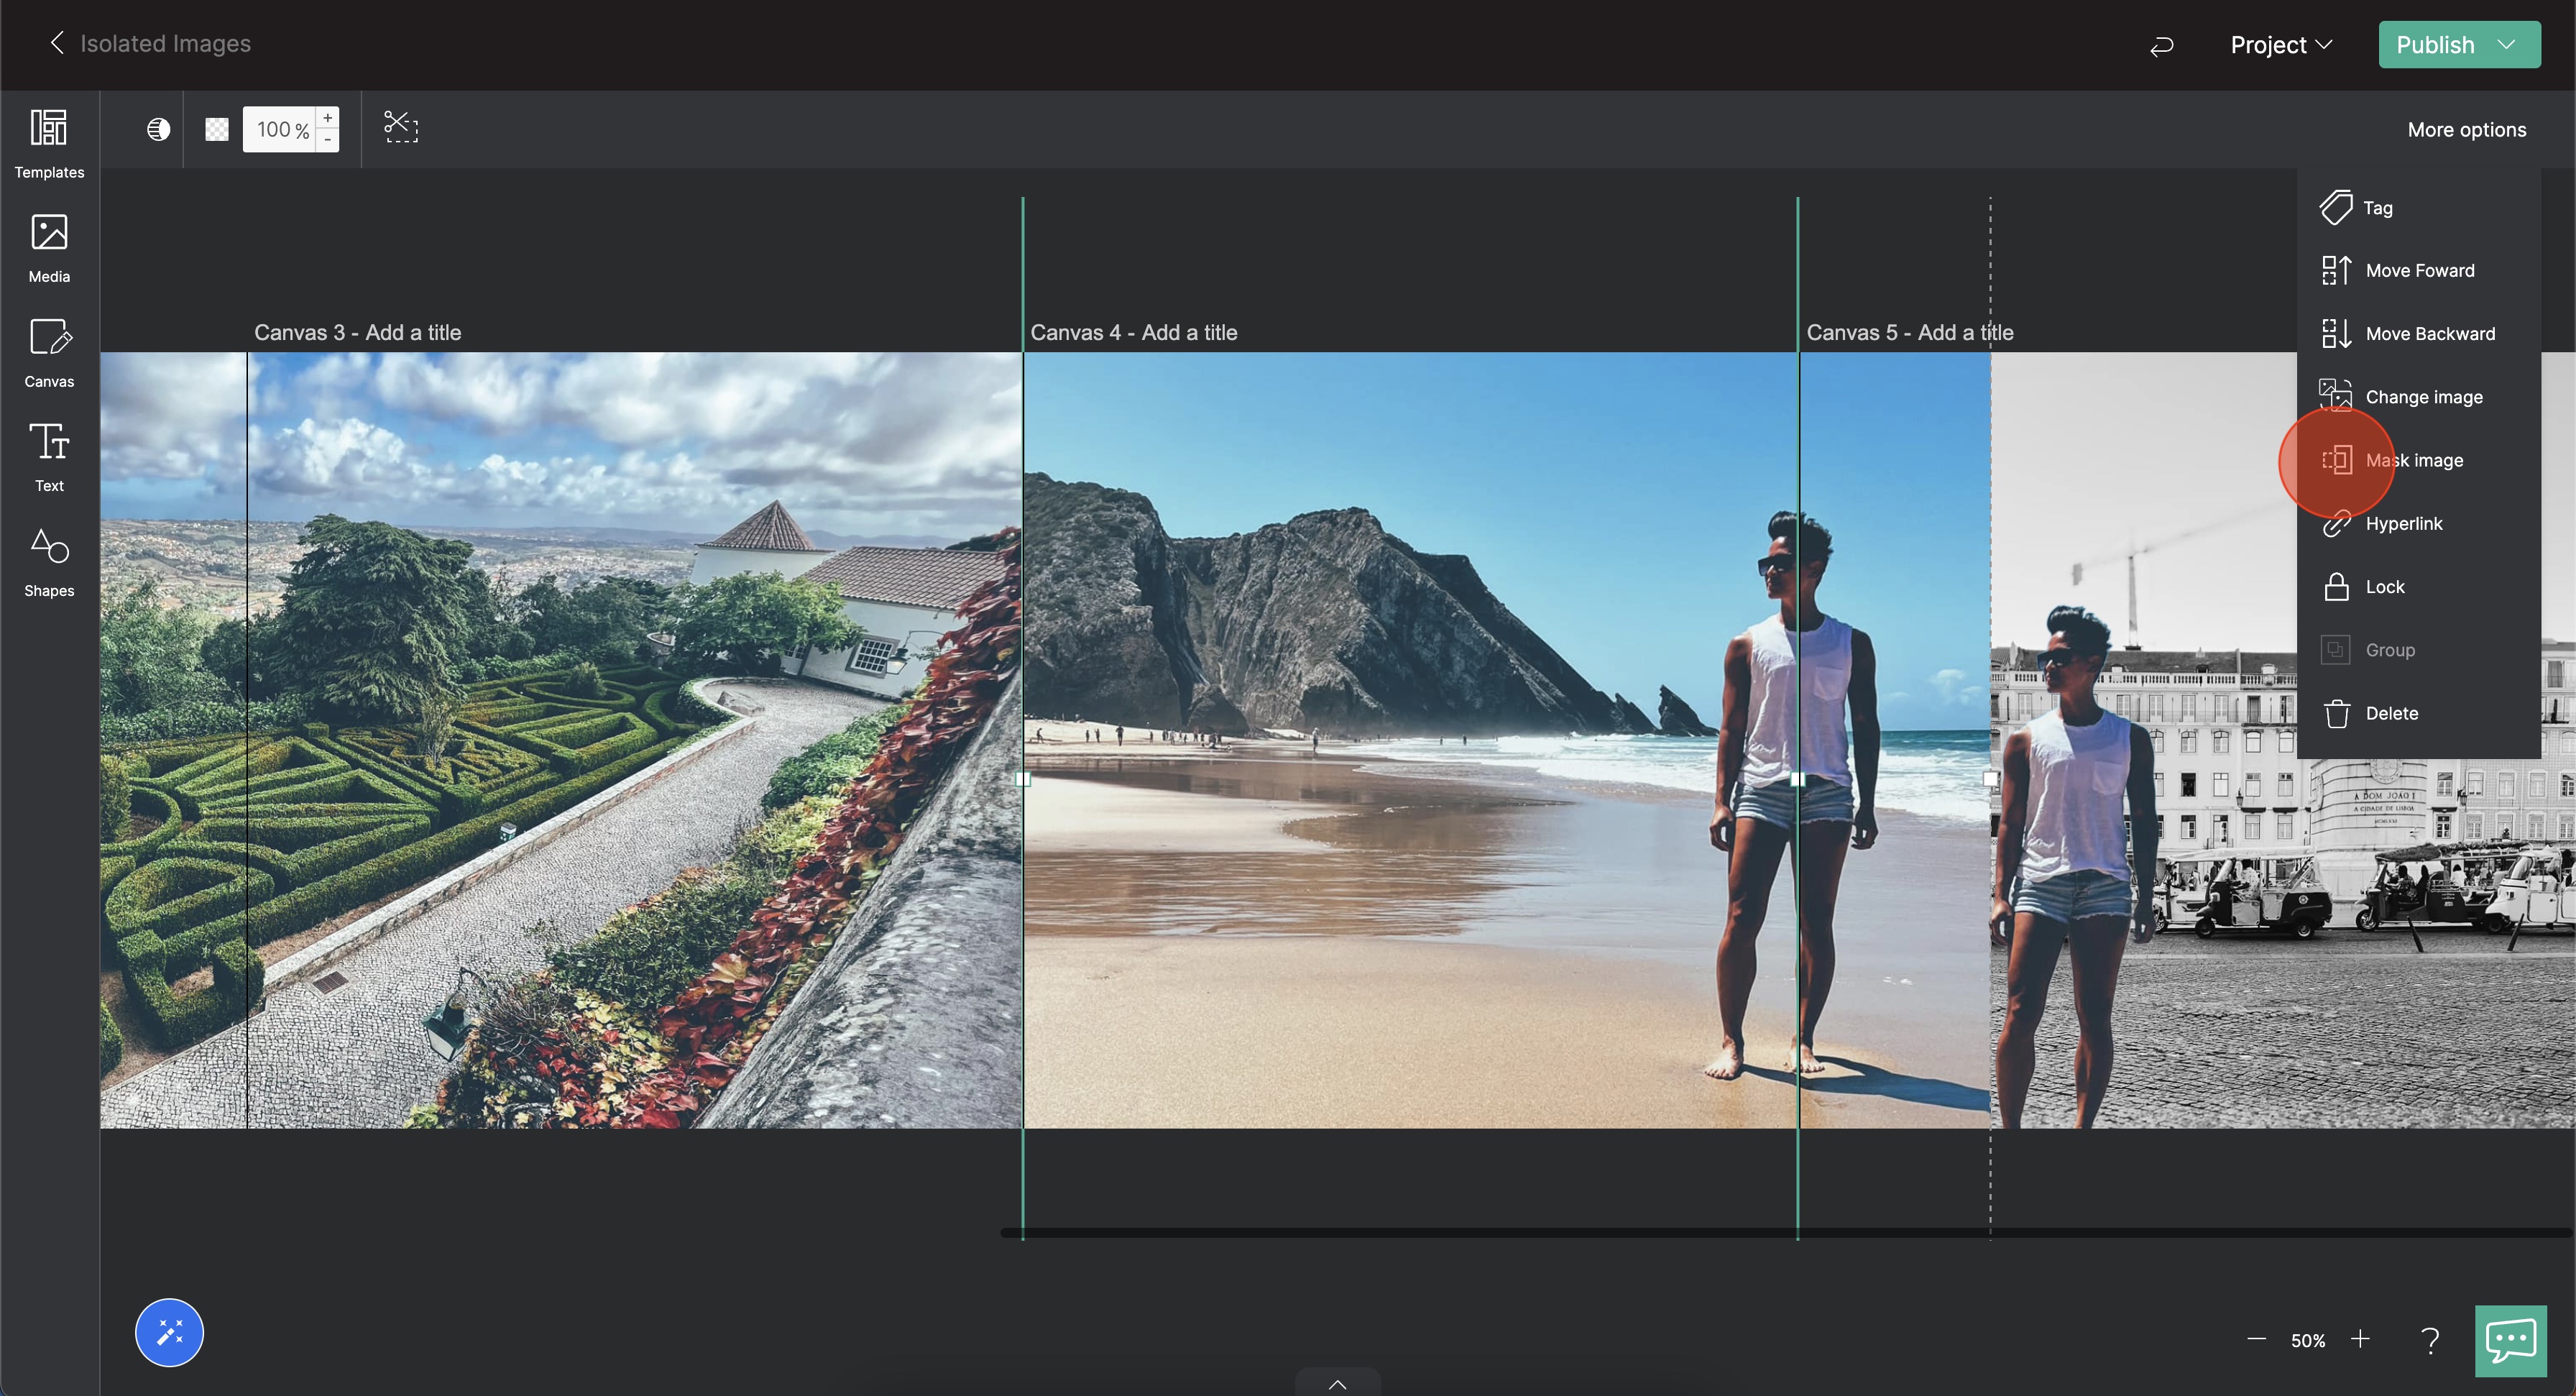
- When you have the mask where you want it, hit "Enter" on your keyboard.
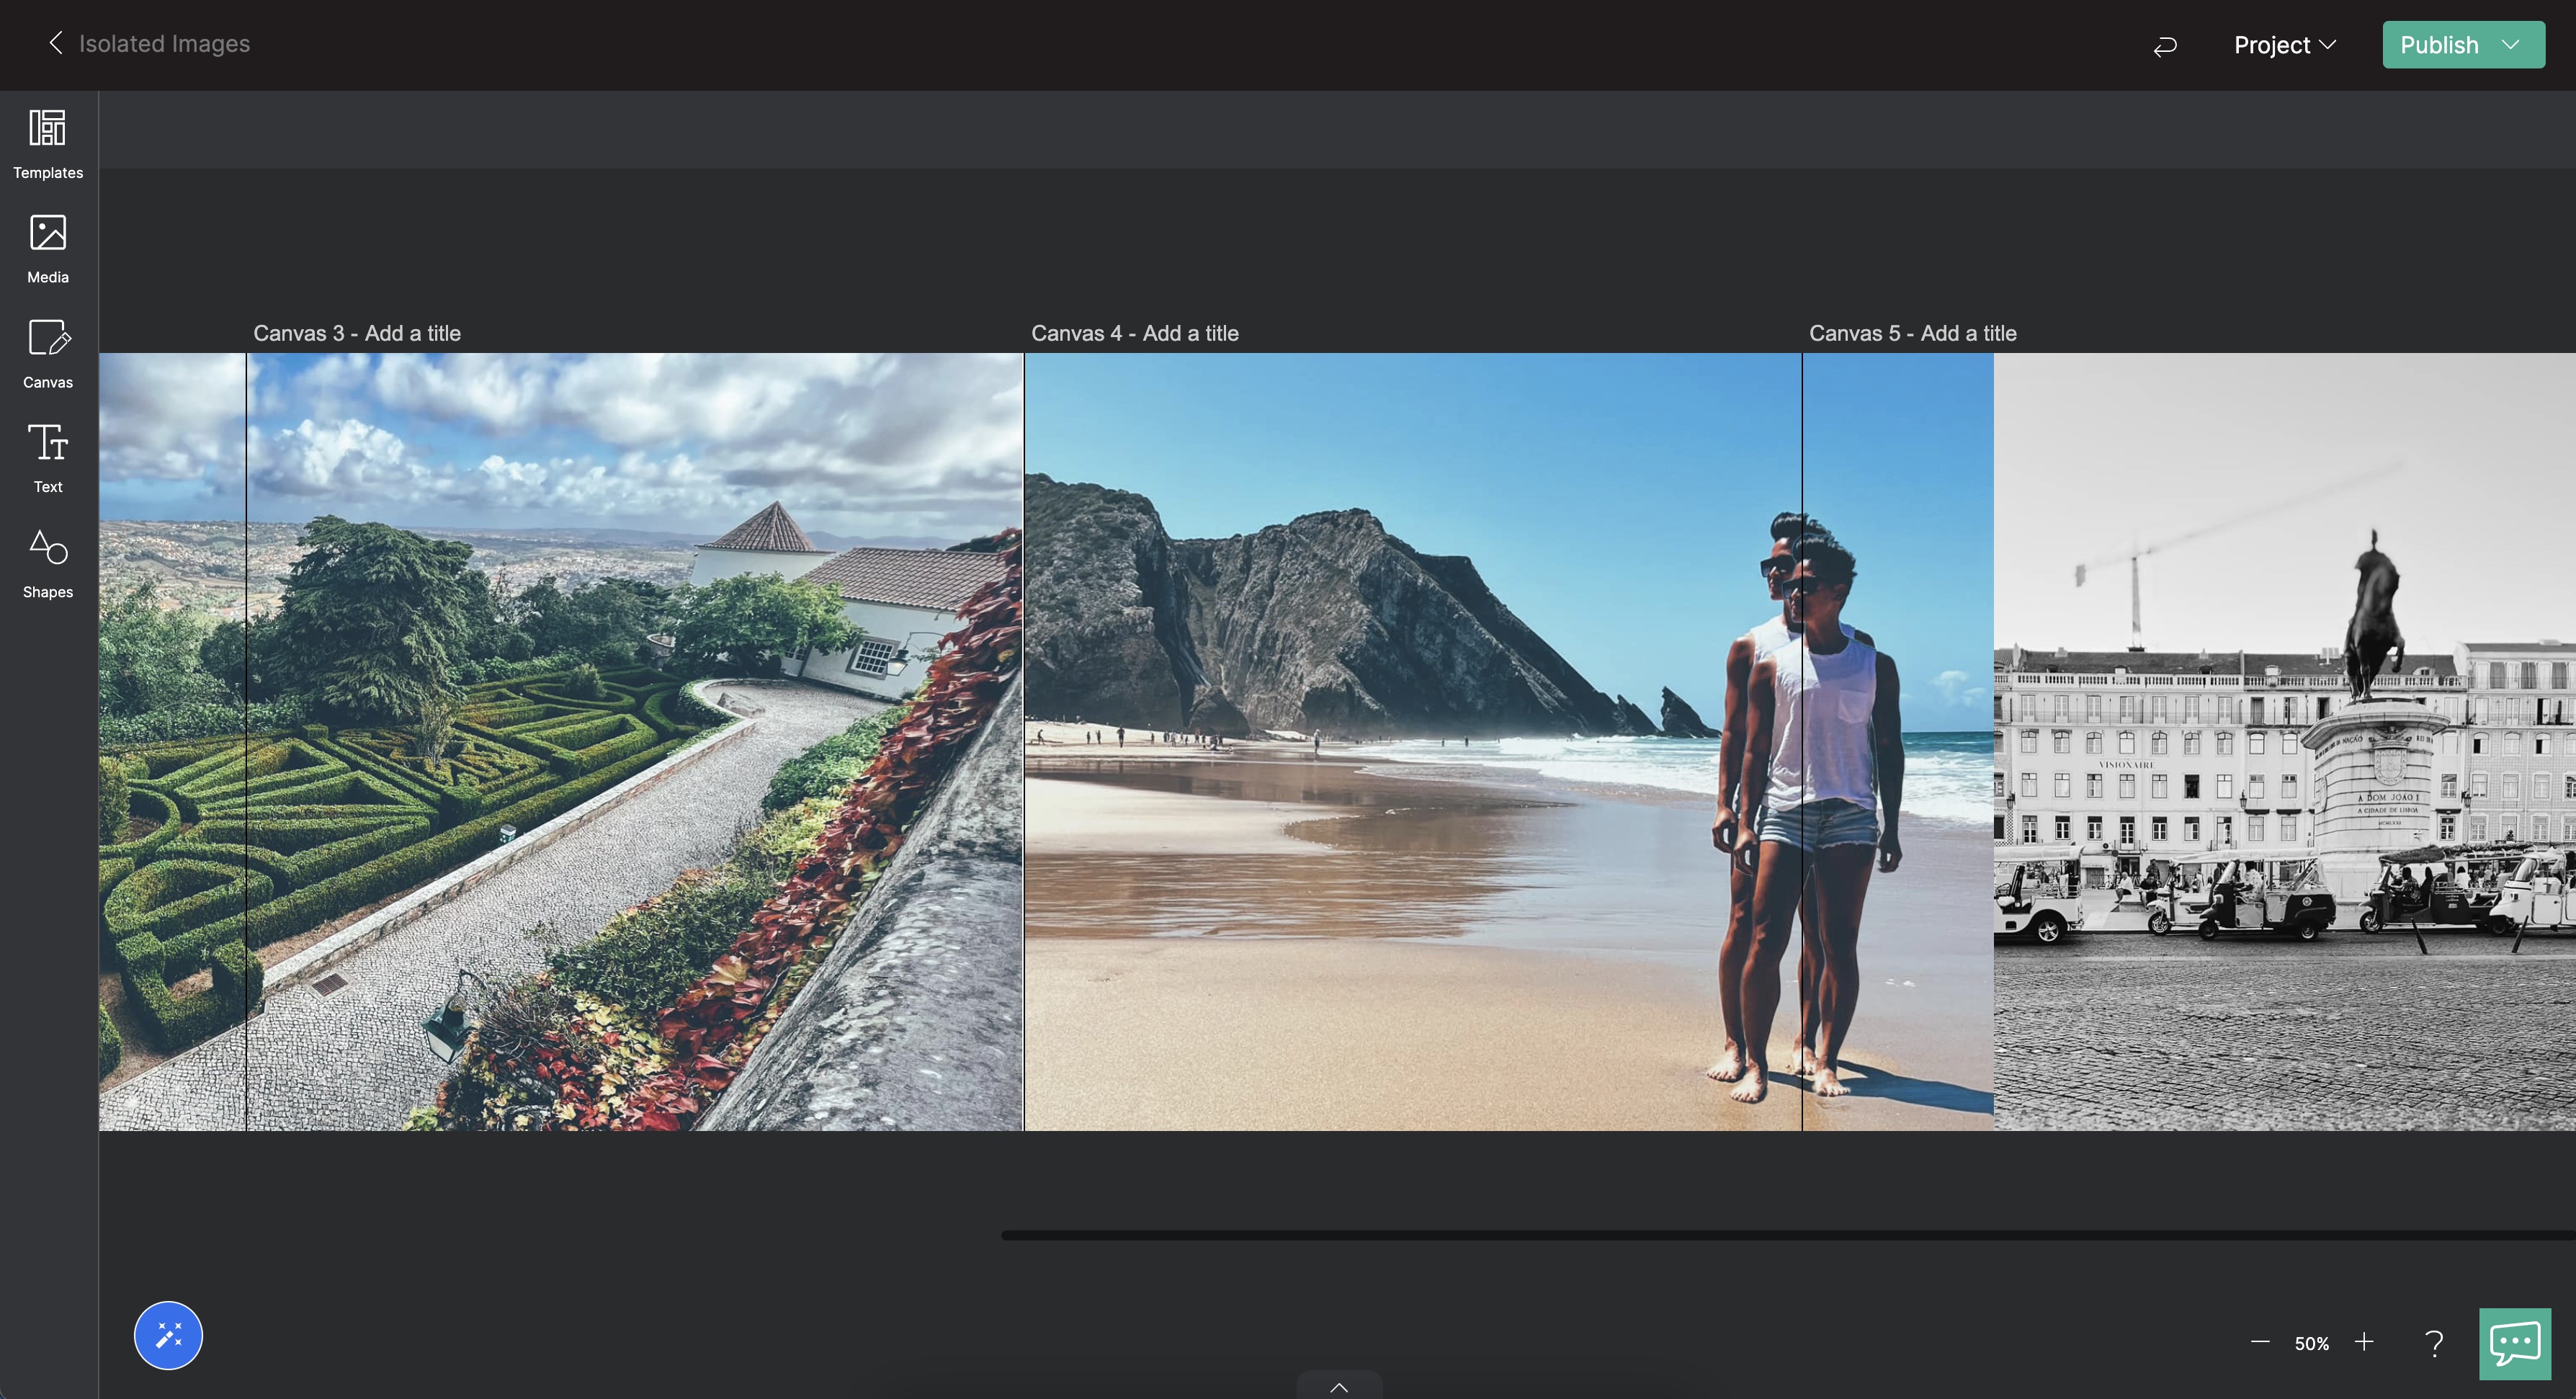
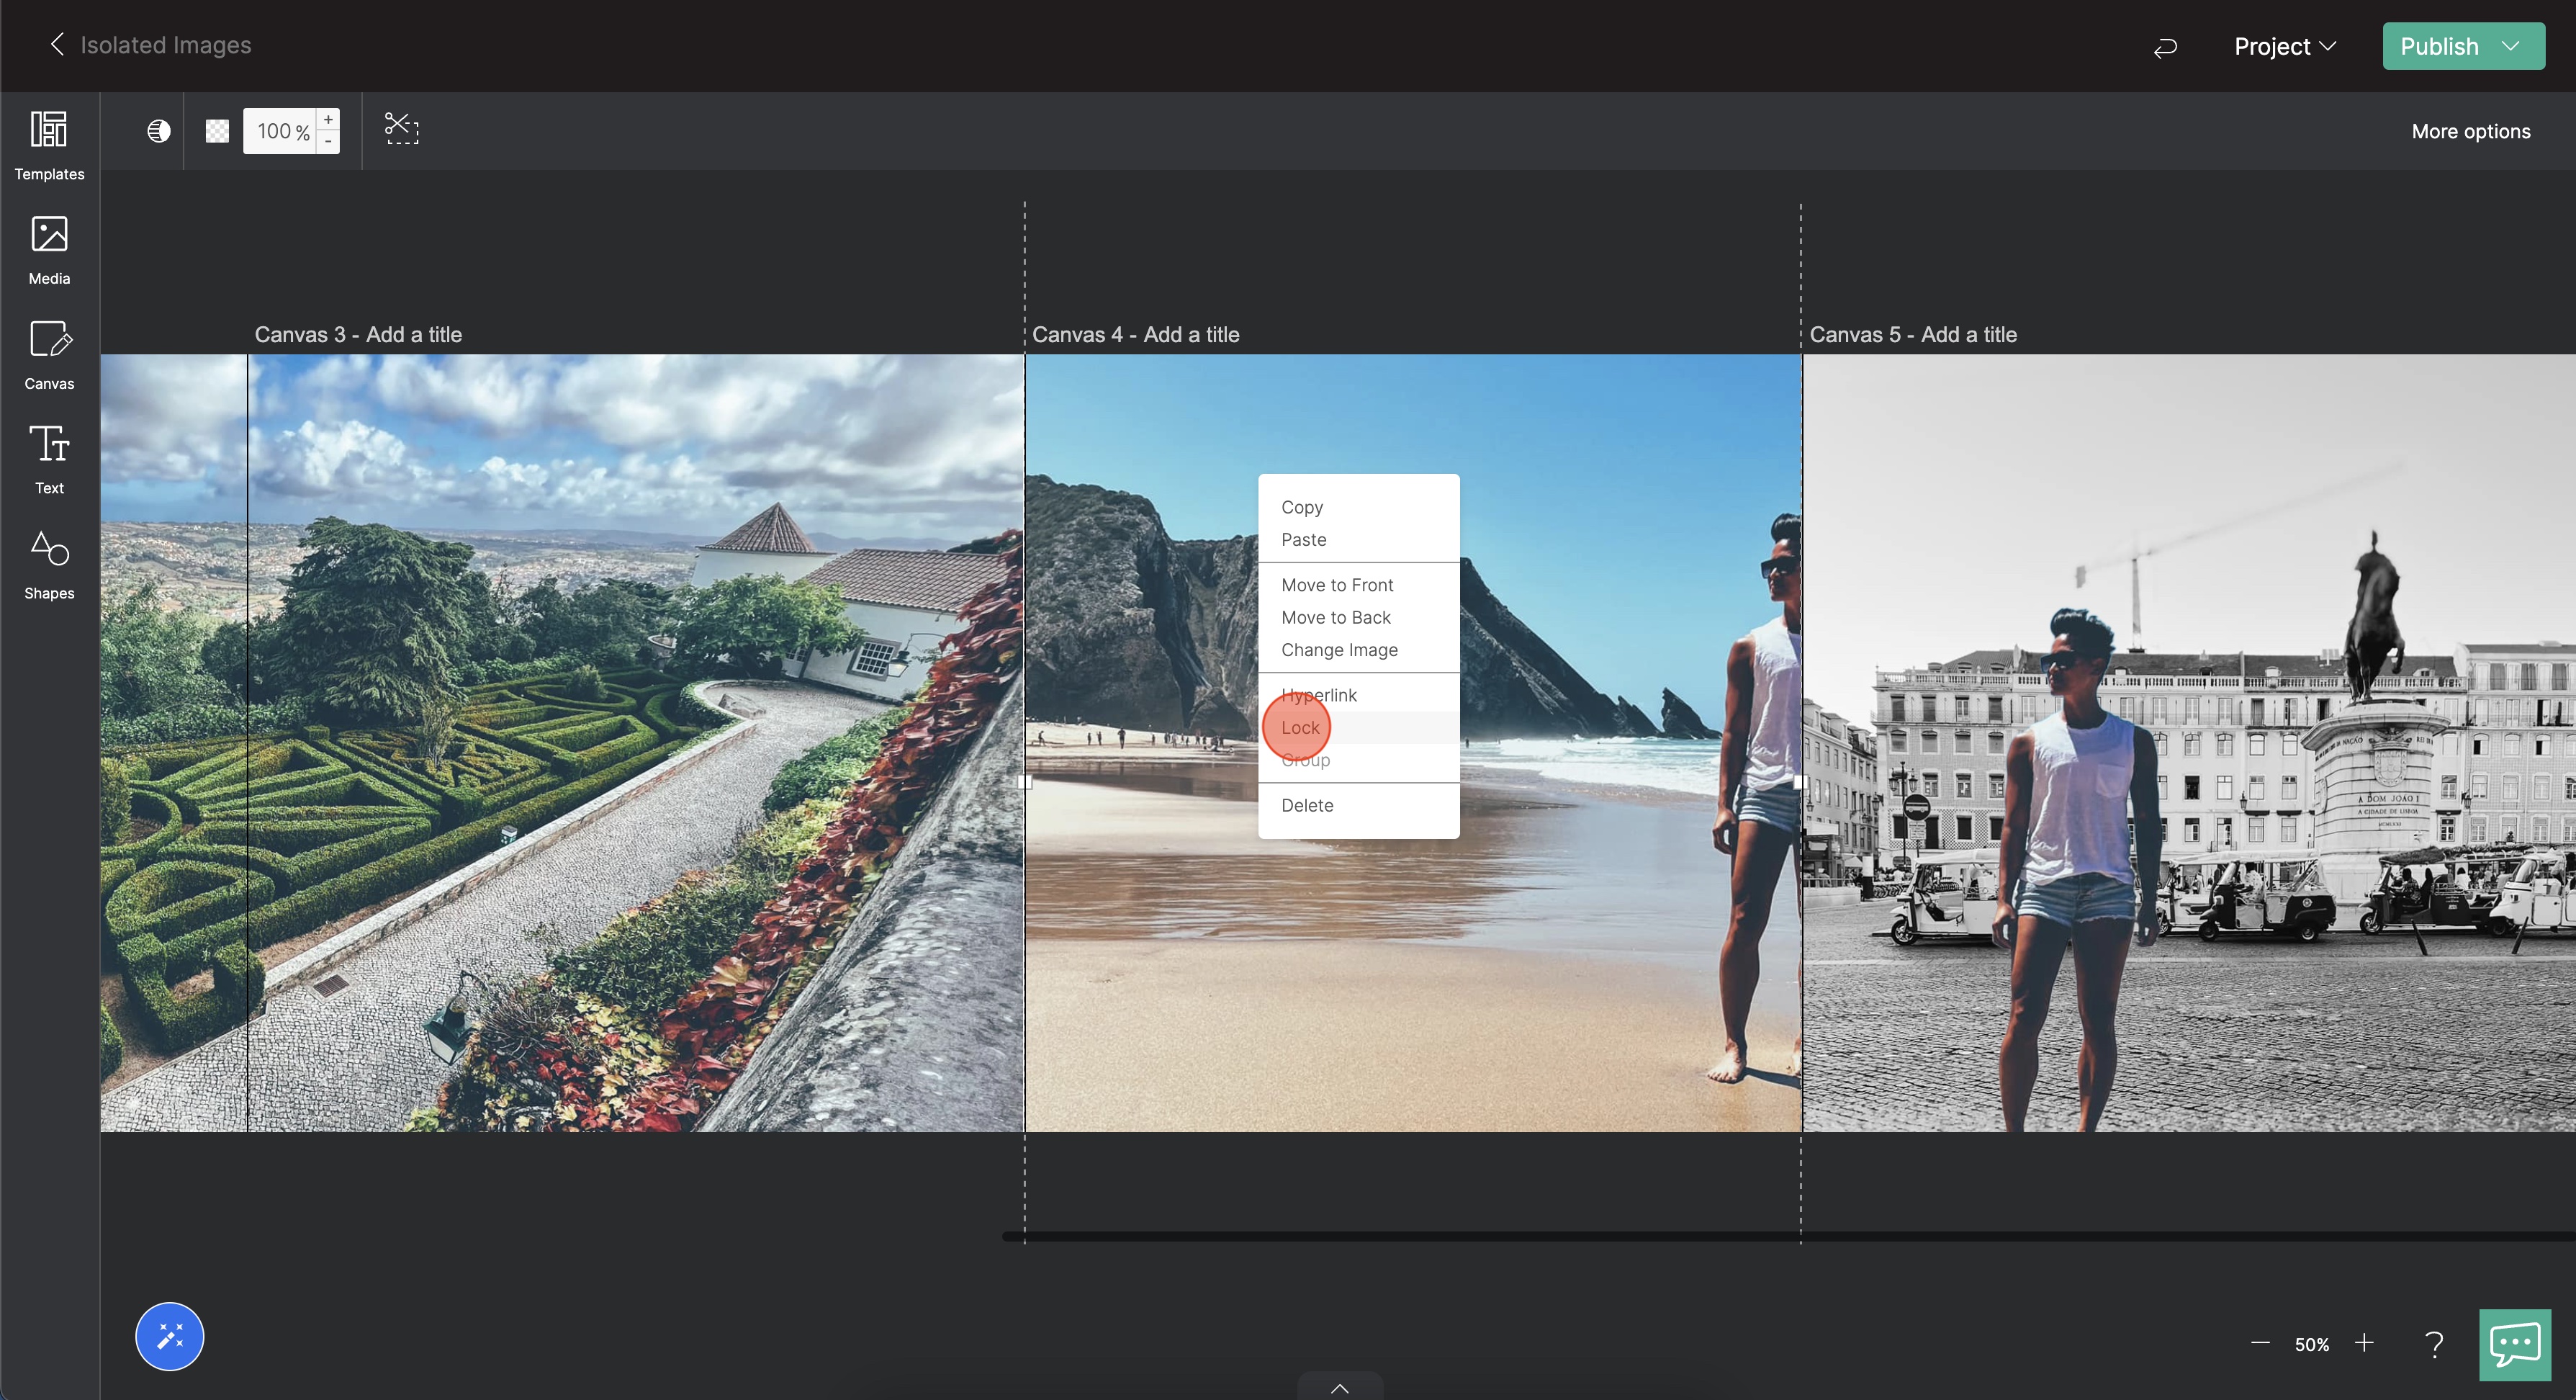
- Next, let's lock that original image. Right-click on the image and select "Lock". This will prevent it being replaced by any image hovering over it.
- For the final step, select your new duplicated and isolated object that you cut out.
- Line it up on top of the original image.
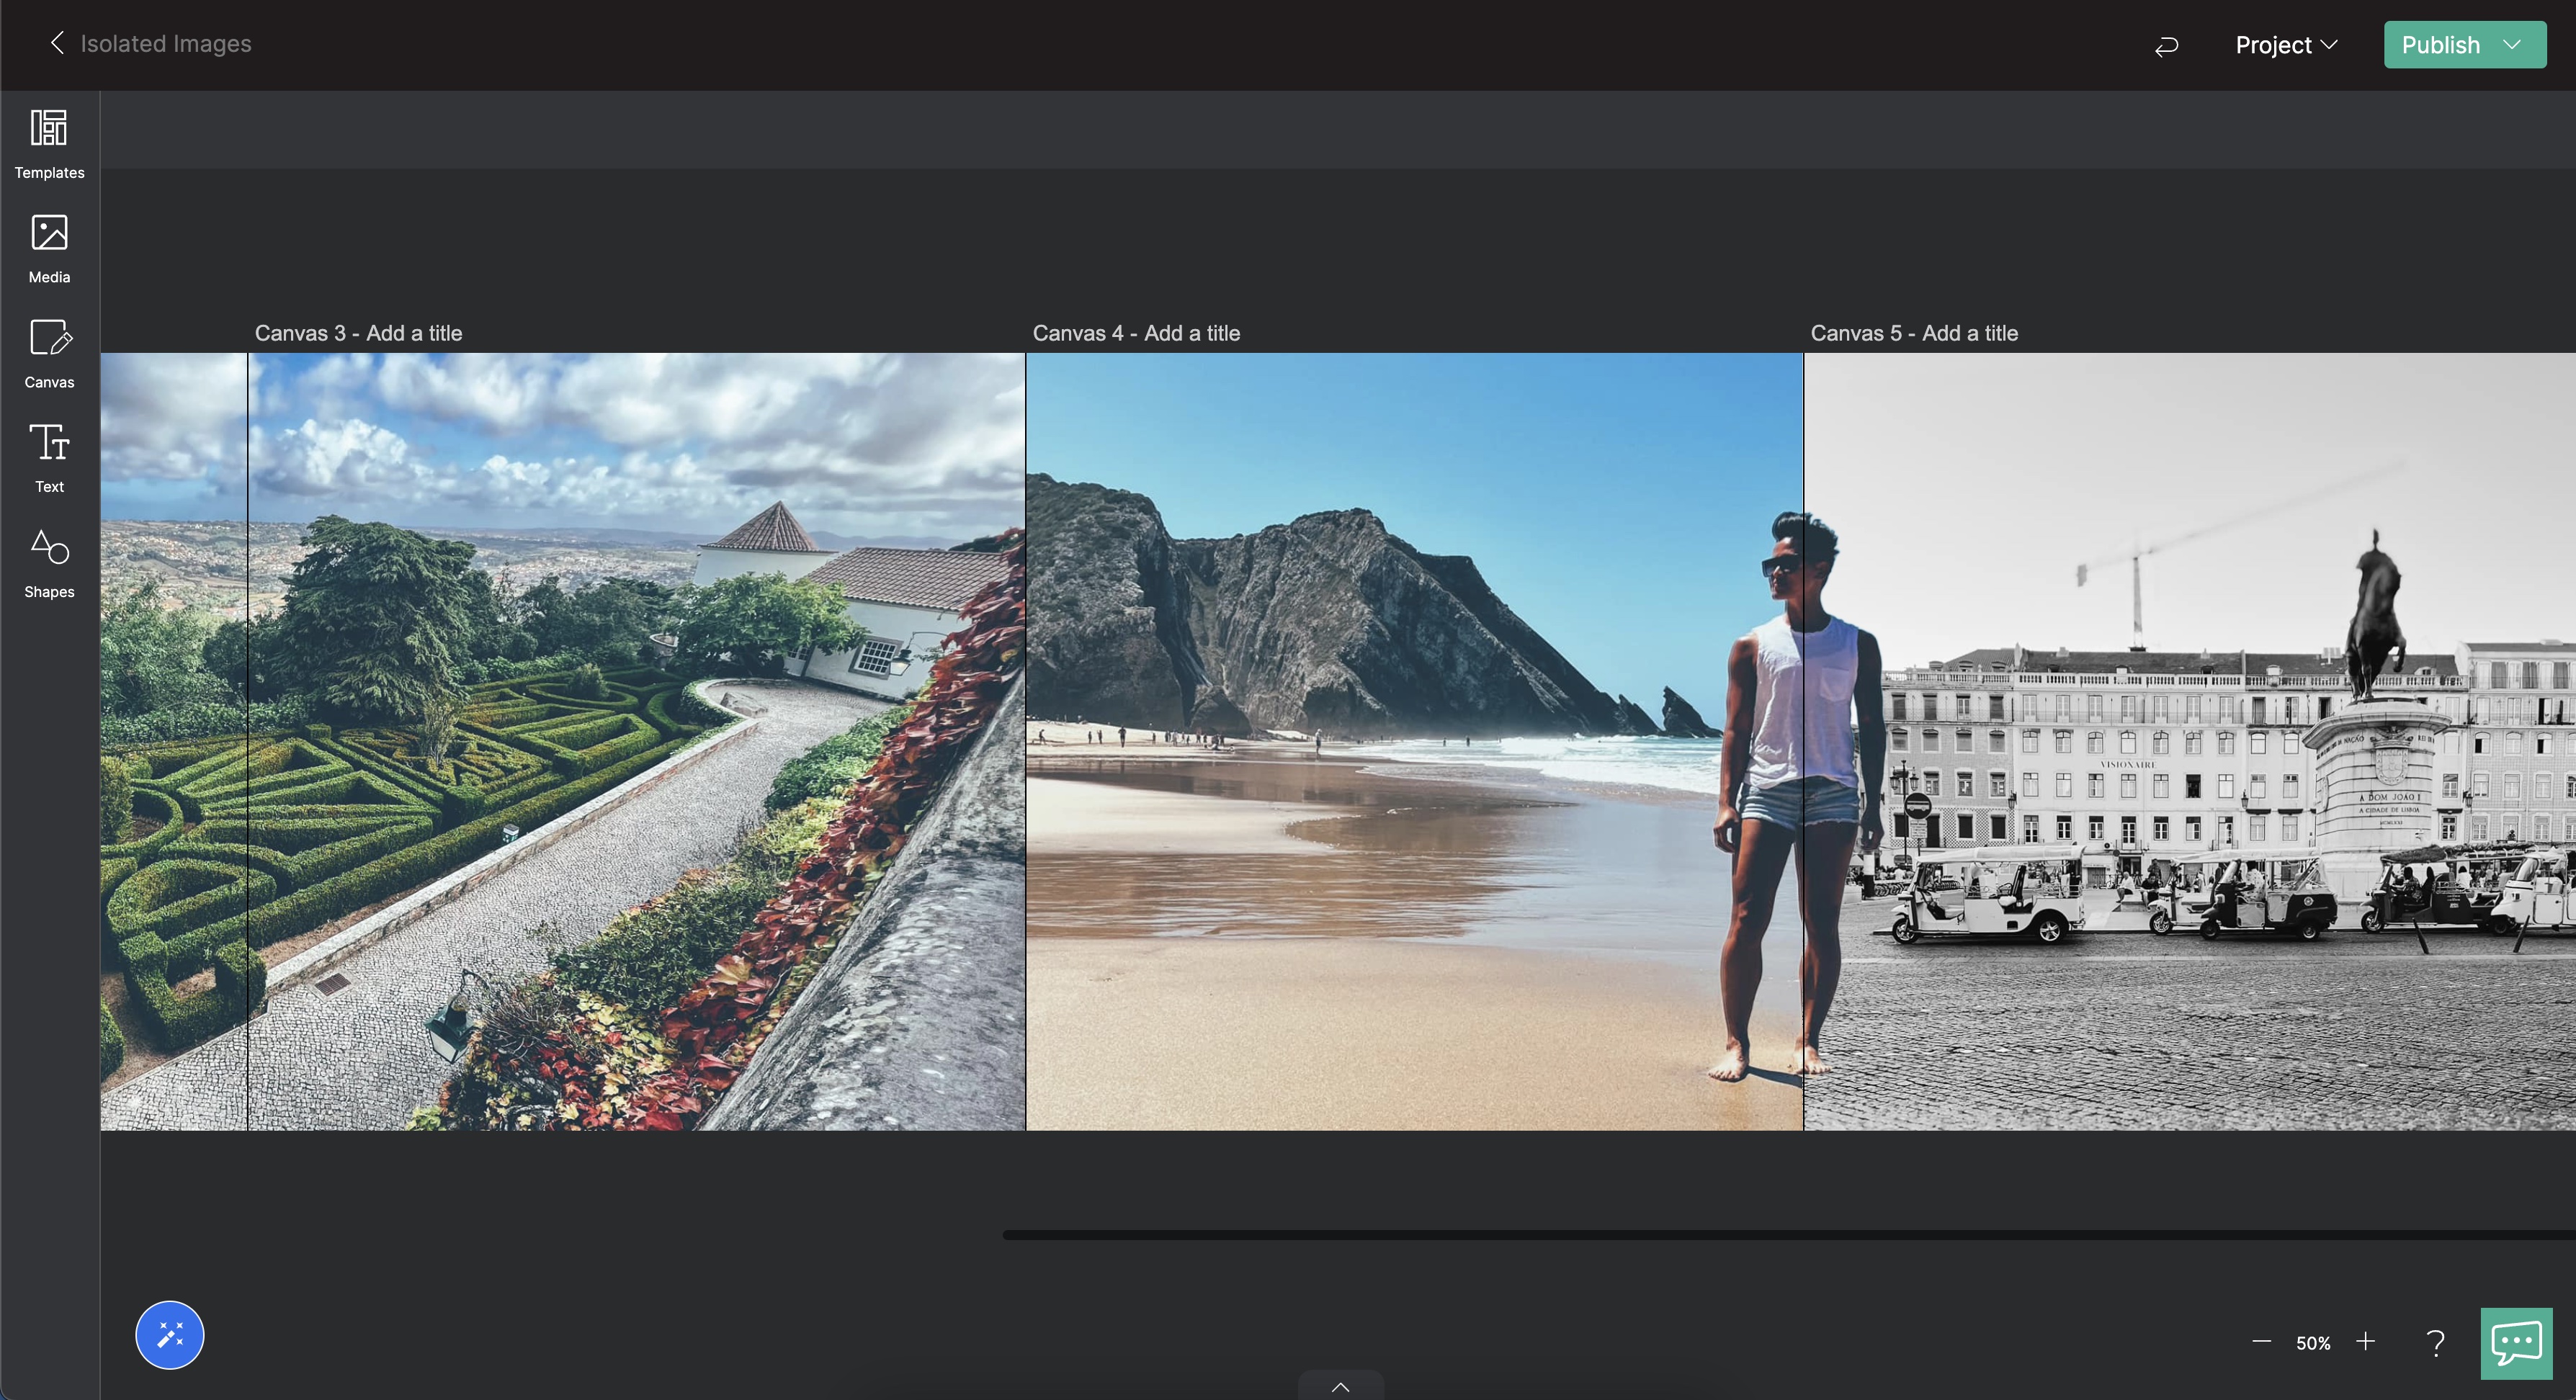
All done! Your final Stagger will look something like this:
Now it's your turn. Tag us in your Peek-A-Boo stories. @wearestagger